Beckler Peak is a great combination of a relatively easy ascent with fantastic views.
I say relatively easy because compared to other trails to summits nearby, it’s a much gentler slope. That doesn’t mean it’s a walk in the park.
The stats:
7.5 miles round-trip
2300 ft elevation gain
Getting to the Beckler Peak Trailhead
This hike is located along Highway 2, on the way to Leavenworth, Washington. There are quite a few beautiful trails in this area.
Highway 2 is a beautiful, scenic route through the Cascade Mountains. This is the road that leads from the Seattle area to Leavenworth – a Bavarian themed town popular with vacationers.
Washington Trail Association has fantastic descriptions and directions to so many trails in Washington state. I never would have found this hike without getting directions from them!
The turnoff to the forest road that leads to this trailhead is very easy to miss. I used Google maps, which gave directions right up to the trailhead. That gave me a heads up for when to turn.
FR 6066 is the name of the gravel road that you need to take. After almost 2 miles, take the right fork for another 6 miles to the trailhead.
The gravel road has some potholes but is in decent shape, and the drive is doable in a two-wheel drive car.
The trailhead has a pit toilet, which is pretty convenient. This parking lot was not very crowded, even at 9:30 AM on a Sunday afternoon.
Pit toilet at the trailhead to Beckler Peak.There were still spots open at 9:30 AM on a weekend!
Starting the hike up to Beckler Peak
The trail overall is maintained very well. It’s very obvious where to follow the trail for the entire length, so getting lost shouldn’t be a concern.
The trail starts at a relatively level grade through a forest with tall grass. You will cross a couple of small streams, with one that has eroded the trail a bit.
This section of the trail is slightly washed out, but easily passable.
Then you continue through an old growth forest, and the trail starts to switchback up the mountain. One of my favorite parts of Washington is the abundance of beautiful forests with huge evergreen trees.
The bugs were pretty annoying for me on the way up, but they were better on the way down for some reason. I only got a couple of mosquito bites, so it was mostly flies.
I passed a few people on the way up. This trail is popular enough that you will see plenty of people, but not overwhelmingly so.
There are a few peekaboo views of the surrounding mountains on the upward climb. One thing I didn’t like as much about this trail was the lack of views until the very top.
Stone steps leading to the top.
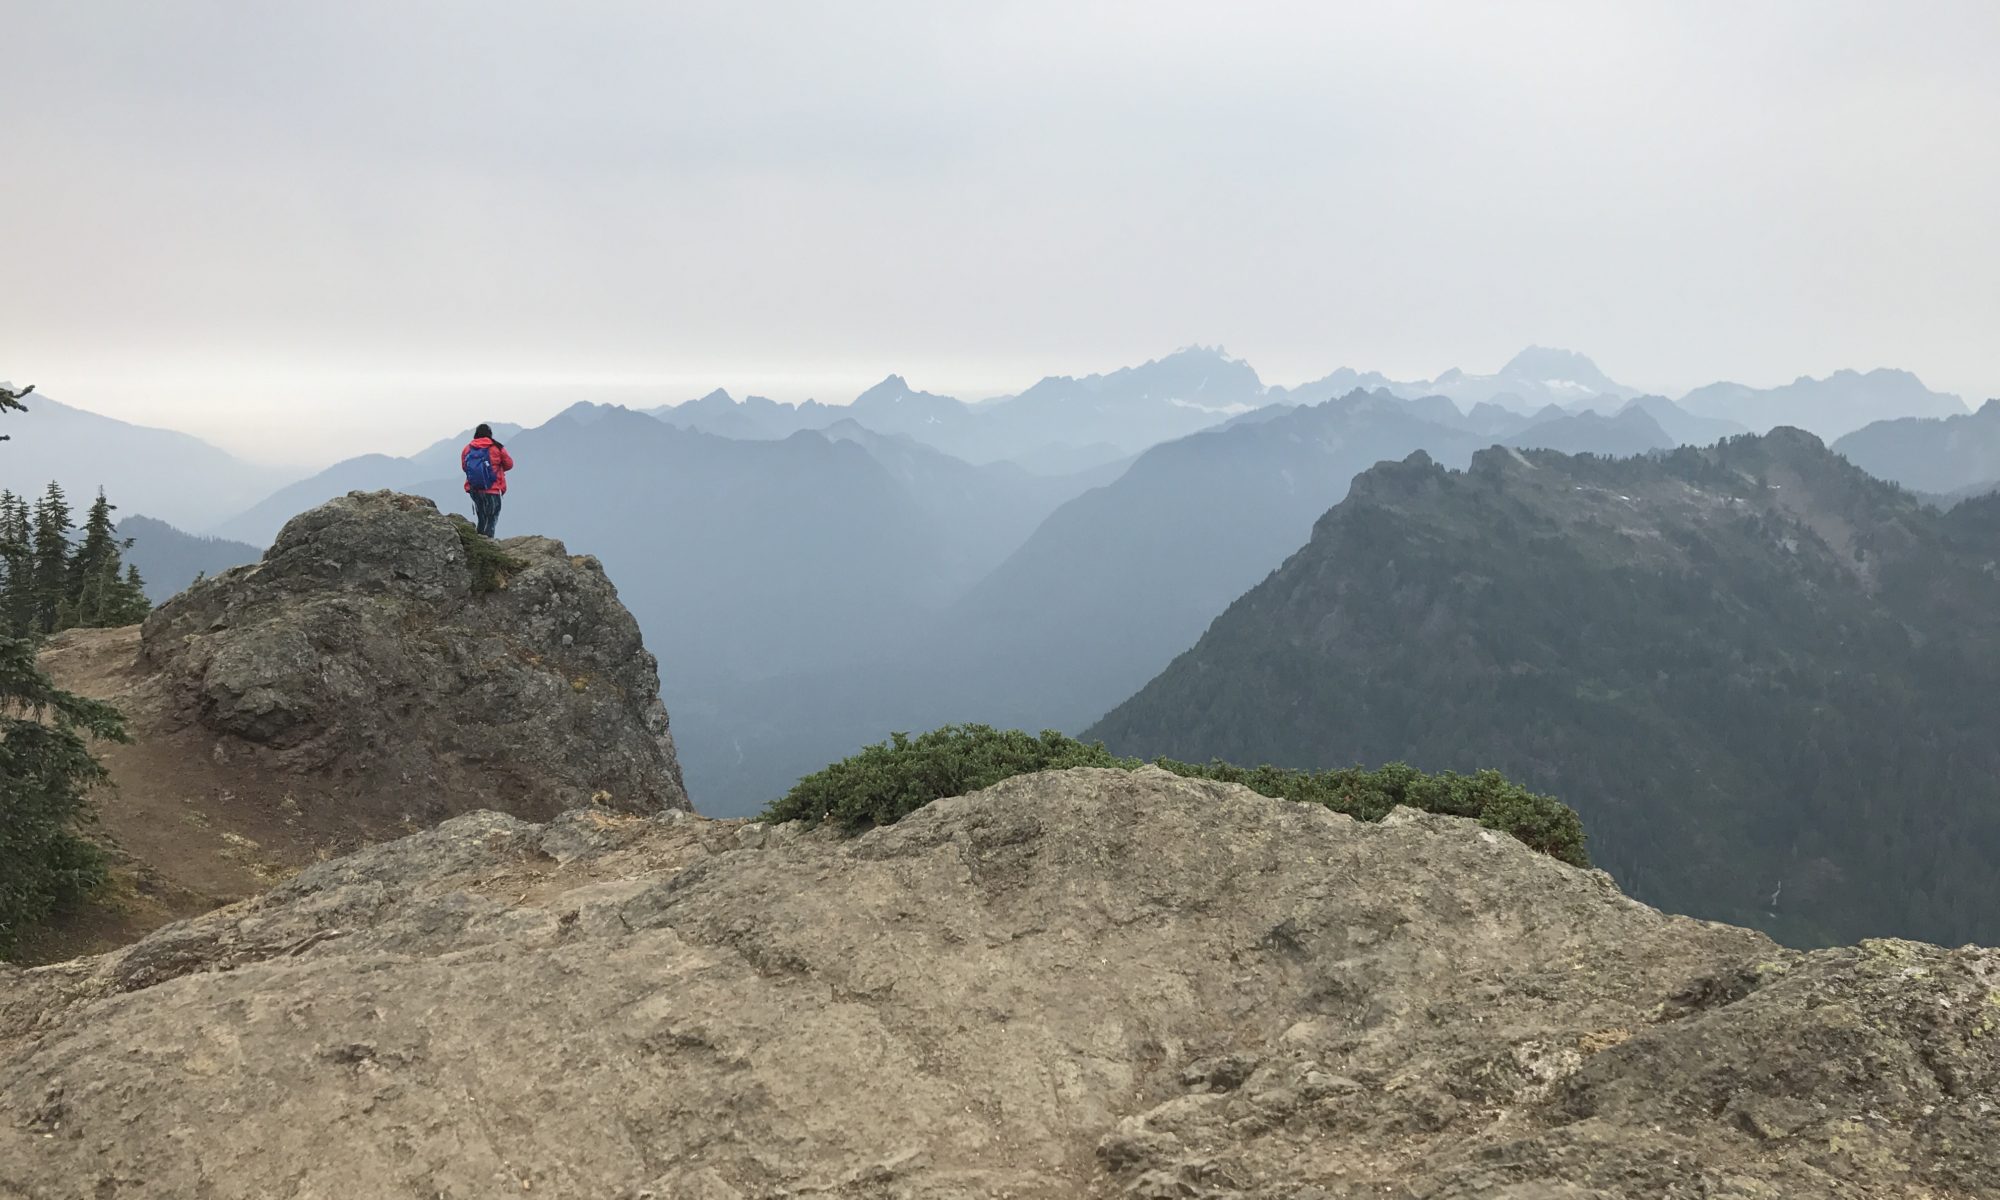
The views at the top reward you for a tough climb!
There were quite a few people at the peak. The top has a rocky outcrop that everyone was lounging on to enjoy the view.
Everyone admiring the view, not much room up here!
It’s a cool place to hang out, but there’s not much room at the top. And no, that’s not a bad cliche!
The summit area does have a few other spots with beautiful views of the surrounding mountains.
View from the main peak.View from another part of the peak area.
One of the best parts of a gentler climb is that the way down isn’t as punishing on your knees. I jogged down part of the way just to get back quicker.
Overal thoughts
The pros of this hike include the easy accessibility, the doable climb, and the fantastic views at the top. The drawback is the lack of views until the very top, and the limited space at the peak.
To be honest, I preferred some of the tougher hikes in this area that afford much more dramatic and sweeping views.
I love the sweeping views of evergreen trees!
Mt. Dickerman, Granite Peak, and Mt Pilchuck were much more spectacular. But those first two trails were also much more difficult climbs, with at least 1500 ft extra gain.
This trail is accessible and easy for dogs as wells, and I saw one group with a dog at the summit.
The other drawback to hiking along Highway 2 is the insane traffic on the way back west on Sunday afternoons. Leavenworth is a popular weekend getaway, so I suspect that is the reason.
I also saw many people out swimming and enjoying the Skykomish river. I would love to go on a rafting trip here someday!
Overall, I recommend this hike if you want amazing views with a decent, but not leg-crushing, climb.
One of my absolute favorite things to do, especially out here in the PNW, is to spend a morning running around on trails in the woods. My Ultimate Direction Adventure Vesta is a key part of these adventures!
(And no, I am not nearly cool enough to get free stuff so I paid for it myself!)
I wore this vest for the 11 mile Samarian Gorge trail race in Greece!
Why do you need a hydration vest?
There’s a state park about ten minutes from my house that provides an easy escape, where I can just zone out and enjoy the scenery. If you’ve ever gone trail running (or just long distance running in general), then you know that proper hydration and nutrition is key to not bonking out halfway through a run.
Unfortunately, water fountains are not readily available in the middle of the forest, or even on some scenic running routes. The easiest solution is to carry everything with you. However, it’s not always simple to carry a significant amount of water and food while running.
In college I did several half marathons. For these long runs, I had a Nathan waist pack with two water bottles. It was okay, but honestly it would bounce quite a bit and cause chafing. It was also just really annoying, and difficult to reach around to get the bottles out mid-run.
I wore this while training for half-marathons in college, and reaching back for those bottles was very annoying!
Buying a hydration vest was life-changing. It doesn’t bounce, chafe, or get in my way, and I can carry plenty of water and nutrition. I can’t express in words how amazing it is to be able to go for a long run with zero worries about water stops!
What makes the Jenny Collection different?
When I bought the Ultimate Direction Adventure Vesta several years ago, it was one of only a few on the market built specifically for women. Since then, many more brands have jumped on this market, which is great news for trail runners!
Ultimate Direction had men’s running vests, but they didn’t always fit women very well. Jenny Jurek took input from a team of female runners to alter the men’s vest to better fit a woman’s shape. It’s designed to fit a smaller frame, and it has straps that can slide up and down to fit comfortably around boobs.
Water Storage in the Adventure Vesta
Essentially, the Adventure Vesta is a small backpack/vest designed to hold water and other supplies for long, unsupported runs. It comes with two flexible body bottles that fit into cinch pockets on the front vest. To be honest, I’ve never used these since I prefer to use a bladder.
Unfortunately, the hydration reservoir is sold separately, but that means you can buy a different brand if you want. There are so many options and different sizes, it’s quite overwhelming. I originally bought the Ultimate Direction brand, but if I buy another I would probably try a different one.
The one downside to using reservoirs is that they are difficult to keep clean and free of mold. I have put nuun in mine, but I had to wash it thoroughly before going back to water.
This vest has a large compartment with a velcro tie to hold the water reservoir, and straps on the front to hold the hose in place. The straps hold the hose so it’s not bouncing and it doesn’t get in your way, but it’s still easily accessible.
One of the best parts of using a reservoir is that it’s so easy to take sips of water during a run. That means I end up drinking more water, and it’s smaller sips at a time instead of gulping down a large amount all at once.
I have not used the flexible bottles (Body Bottles), but many other people have and love them. The benefit of flexible bottles is that they compress as they are emptied and don’t slosh around as much.
The Body Bottles provided are the kind that open when you bite into the nozzle, so you don’t have to mess around with opening/closing it.
The Body Bottles that come with the vest.
Storage Space in the Adventure Vesta
The Ultimate Direction Adventure Vesta is different from the original Ultra Vesta in that it’s slightly bigger and provides more storage space.
The Adventure Vesta is meant for longer and more extreme trail runs or hikes. It has straps in the front and back for hiking poles, and a strap in the back for an ice axe. I have not used either of those items, but it’s nice to know the option is there.
I decided on the Adventure Vesta instead of the regular version of the vest because I could fit more food and gear into it. This gives me the flexibility to use it for longer hikes as a small backpack. If you’re more competitive and want to carry the lowest weight possible, I would recommend the original version.
There are two zipper pockets on the front of the vest. The one on the right is larger than the one on the left. I use the larger one for my phone, and it’s just barely large enough for an iPhone 7 with a normal case.
I like to put trail maps in the left pocket and my phone in the right pocket!
The one downside to these pockets, at least on the version of the Adventure Vesta that I bought, is that they aren’t large enough for the newer monster sized smart phones. They have fixed that problem on the newest version.
There’s also a small non-zipper pocket on the left side of the vest. I don’t use it much because it’s small and easy for stuff to fall out, but you could fit a gel in there.
On the back, there is one large compartment separate from the water reservoir section. This section has a zipper on the bottom in addition to the top zipper, so you can access your stuff easier without having to dig around.
There are also two separate zippered pockets on the outside of the larger one, which are great for storing snacks and smaller gear. A large mesh pocket holds anything that you don’t need in a zipper pocket.
You can see the water reservoir compartment, the larger compartment, and the mesh pocket.
The bungee on the outside of all the pockets is one of my favorite parts of this vest. I usually will put my running jacket in there, and the bungee holds it in place. Since it’s not actually in the vest, it doesn’t stretch the material or take up space.
Fit
This pack is part of Ultimate Direction’s Jenny collection, which are products specifically designed for women.
The fit of the vest is smaller than their men’s vests, and it comes in two sizes. I was in between the sizes and ended up with the small/medium. It does fit me very well, although if I wear several layers it gets a bit tight.
One of the key components in making the fit great is the adjustable straps on the front. You can slide both straps up and down to whatever is the most comfortable for your body.
You can slide these straps up and down.
You can also adjust the waist straps with velcro. On mine the velcro has started to wear a bit, and it sometimes rubs against my elbow.
This strap is secured with velcro, but the velcro has started to lose its grip.
I was pleasantly surprised by how little wearing this vest impedes on my running. It’s noticeable that it’s there, but it doesn’t chafe or bounce around annoyingly.
Pros and Cons
The TL;DR version of my review:
Pros: No bouncing, fits well, adjustable chest straps, lots of pockets/storage, trekking pole and ice axe straps, comes with flexible water bottles, pretty colors
Cons: Expensive, slightly heavier than some packs (because it’s a long distance running pack), velcro on waist straps can chafe elbows, front pockets are too small for new smart phones
Note: The version of this vest that I have is several years old, and the newer models have solved the velcro issue and have bigger pockets for smart phones!
You can still buy the older version for a slightly cheaper price, but I would recommend splurging for one of the newer products. They have soooo many different vests out there now, I wish I could try them all!
Overall, I absolutely love my vest and I am so glad I shelled out the money for it. The biggest benefit to me has been the ability to go on long runs and trail runs without having to stress about where I’m going to get water.
It has also stood the test of time – I purchased this vest around August of 2016, about two years ago, and it’s still in the exact same condition. It’s pretty clear that Ultimate Direction makes high quality products.
I wear the Ultimate Direction Adventure Vesta while hiking all the time!
(I realize how #hailcorporate that sounds, but I really do love this vest!)
I even wore it during my marathon! I personally loved being able to take sips throughout the race instead of gulping down water and gels at the aid stops.
There are several other brands that have come out with women’s specific running vests since I bought this one. I haven’t tried any of the others, but I highly recommend this brand!
I don’t know why, but I love doing hikes to a fire tower – maybe it’s just the novelty of seeing a man-made structure after walking through miles of wilderness. Granite Mountain Trail takes you up, up, and up to the top of a mountain with a lookout that was originally built in 1924.
This hike is 8.6 miles out and back, with 3800 ft of elevation gain. It’s relentlessly uphill, so be prepared for your legs to hurt!
Getting to the Trailhead
The trailhead for Granite Mountain is right off of I-90, to the east of Seattle. When I moved to Washington, I quickly realized that many of the best hiking trails required driving long distances on windy gravel roads covered with potholes. So the ease of access is a huge plus to this trail.
I arrived at the trailhead at 8:30 AM and the parking lot was already full, with more cars parked along the road leading to the trail head. So if you’re wondering how early you need to get to a popular trail near Seattle on a beautiful summer day to beat the crowds, the answer is much earlier than 8:30 AM!
Long line of cars parked outside the trailhead.
When I go hiking alone, I actually prefer to be on busy trails because if anything were to happen, there are plenty of people around to provide assistance! Plus it’s much more difficult to get lost.
The hike to Granite Mountain shares a trailhead with Pratt Lake trail, and you must have a Northwest Forest Pass to park there ($30 for a yearly pass).
Granite Mountain trail starts off suspiciously easy!
The first mile is a gradual climb and wanders though a beautiful forest, crossing a few streams. After 1.2 miles, the trail splits off with Pratt Lake to the left and Granite Mountain to the right.
At this point, the trail begins steep switchbacks up the mountain. After about a mile you leave the shade of the forest and enter alpine meadows. The views are spectacular, but if it’s hot there’s no shelter from the sun.
If you look to the south, you can see Mt. Rainier peek out above the other mountains as you gain elevation. There are several other peaks that present themselves, providing 360 degree mountain views.
You can see Mt. Rainier peeking out!
There are two ways to get to the summit.
Towards the top there is a small meadow, with two options for reaching the summit: the “boulder route” is to the left, and requires scrambling on boulders along the ridge, and the “summer route” to the right, which is slightly longer, but gently ascends through the meadow.
You can go left and scramble over boulders along the ridge, or go right for a gentler approach on snow-covered fields.
The summer route is often covered with snow until late July, which can make the boulder route more attractive to some people. I did this hike on July 14, and there were still a few patches of snow. All the snow was on flat ground however, which made it easy to traverse.
I was a bit confused by the different options at first and ended up doing the boulder route up to the top and coming down on the summer route. The boulder route is definitely more scenic and provides ridiculously amazing views in either direction along the ridge. It does require some minor scrambling over rocks, and if you have a dog you will have to take the summer route.
View of surrounding mountains from the top
Take a few minutes to enjoy the scenery at the summit!
The lookout tower is normally closed to the public, but provides a nice spot to rest and eat lunch. On a nice day in the summer, expect the summit to be quite crowded. Luckily, the abundance of boulders on the ridge provides ample spots to rest while enjoying the views.
Unfortunately, what goes up must come down, and descending a steep trail like this one can be difficult on the knees. I kept thinking I was almost to the end, but the trail just kept going!
It took me about 5 hours to do the entire hike, but that includes spending some time at the top to eat and take photos.
Overall, I highly recommend this trail to anyone who wants a great workout with a nice payoff at the end.