Rock Climbing in Crete, Greece

rock climbing crete Greece

This post may contain affiliate links.

Rock climbing is one of the hottest sports lately, leading to its inclusion in the 2020 Olympics. In the US alone in 2017, 43 new indoor climbing gyms opened, which is a 10% growth rate. Chances are good that you know somebody who regularly climbs or you’ve been invited to go climbing.

Why is Greece so popular for rock climbing?

Greece is one of the hottest new places to go rock climbing. More and more serious rock climbers are setting out to spend their vacation in Greece.

Greece, and specifically Crete, is full of limestone, forming stunning cliffs that are perfect for climbing. Crete also offers top-notch beaches, scenery, and weather to go along with a climbing trip. You can finish up a long day with a swim at a beautiful beach and excellent local Greek food.

We went on two separate rock climbing trips in Crete, and I highly recommend both spots.

Voulismeno Aloni

The first one was to Voulismeno Aloni, which is only about 15 minutes from Heraklion. It’s a sinkhole that was formed when a cavern roof collapsed. The walls surround the center like a bowl.

rock climbing crete Greece
The routes span the length of this wall, around the center of the crater.

The routes in this area range from beginner-friendly to advanced. I was the only one in our group who had done outdoor climbing before, and it had been years since I’ve gone.

Our guide, Tim, did all the lead climbing for us and taught us the basics. If you’re new to climbing, you should know that it’s essential to have a solid partner to belay you.

One of the biggest misconceptions that I’ve encountered about rock climbing is that it’s a very dangerous sport. This is so far from the truth!

Almost all climbers use high-quality ropes and gear to ensure their safety. Rock climbing ropes are made to specific standards, as well as sport clips, belay devices, and carabiners. They have all been tested to handle the large amounts of force from a falling climber.

Overall, Voulismeno Aloni is a great place to climb. It’s close to Heraklion, there are over 40 routes, and the difficulty ranges from 4c to 8b.

rock climbing crete Greece
My co-worker attempting one of the easier routes.

We started on a section of the wall that was closer to the entrance, and it was a good warm-up. There are several easy, beginner-friendly routes next to each other. Just because it’s easy doesn’t mean it isn’t fun!

Then we moved on to a harder route that was further back into the bowl. There was a difficult section towards the top that I had trouble getting over because my arms were toast!

rock climbing crete Greece
I was dying at the end of this!

By the way, Europe tends to use the French rating system instead of YDS, which is used in North America. A 4c is roughly equivalent to a 5.7 – this is a route that any beginner should be able to climb fairly easily.

I found this video of a woman climbing at Voulismeno Aloni, if you want to see what one of the more difficult routes looks like. Also, she is a complete badass and someday I would love to be able to create videos like that!

Therisoss

The second place we visited was Therisoss, which is a gorge near the city of Chania. It’s a beautiful drive and this area attracts many tourists.

The cliffs stretch up on either side of the road as you drive up into the gorge. We parked just off the road, and walked about 50ft to our climbing site.

Unfortunately I did not get any good pictures, but you can google for pictures or better information.

Therissos also has routes that range from beginner-friendly to more difficult. It’s very popular among the local climbers who live near Chania due to how close it is. There are numerous sport climbing routes established on these cliffs.

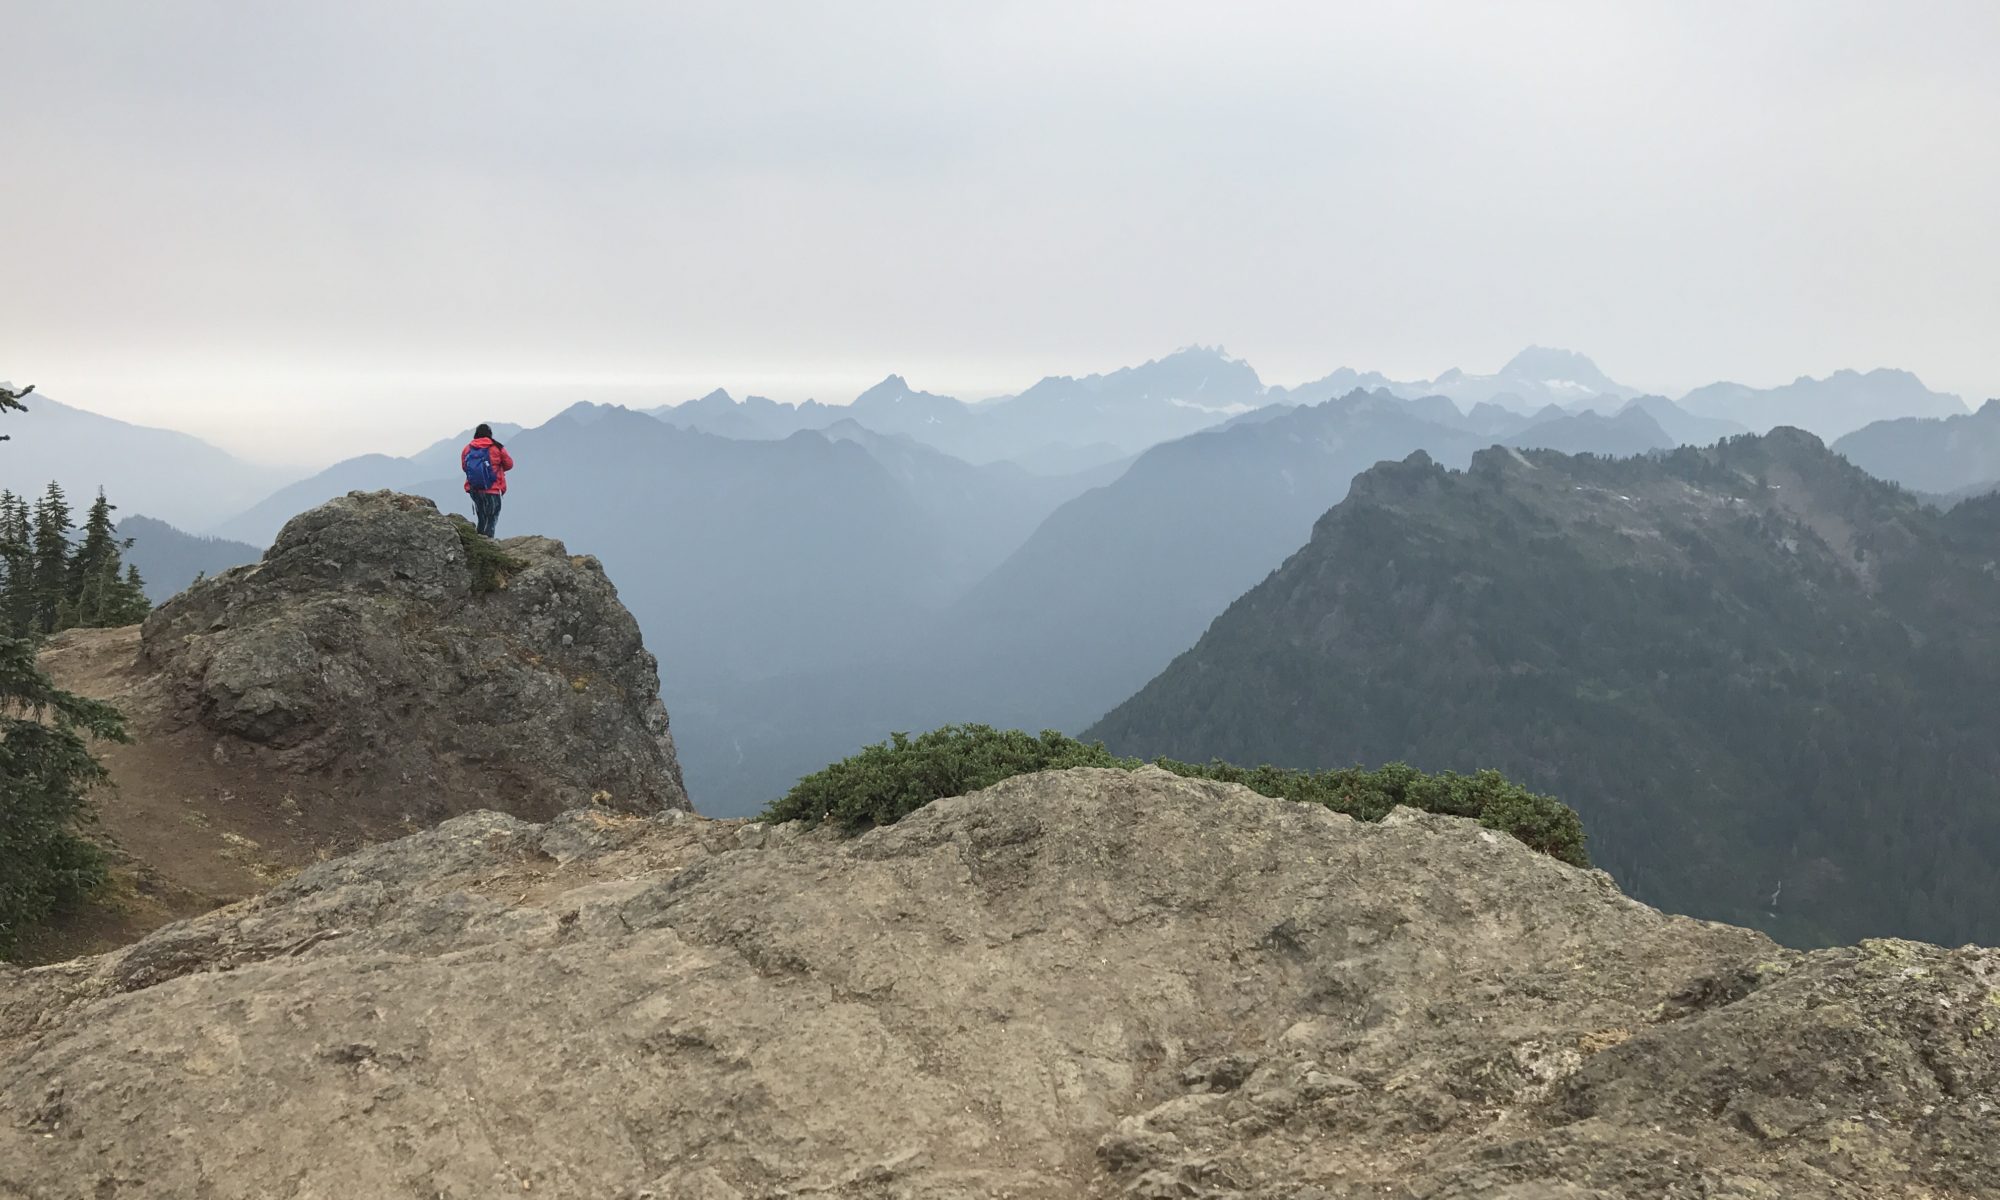
The other cool thing about climbing here is the excellent views you get at the top of the climb. You can’t see much down in the gorge, but climbing higher opens up views of the surrounding mountains!

After several hours and many attempts of each route, we packed up and drove to Therissos, a village in the mountains. There is some history surrounding this village and a statue of a famous Greek politician in the square.

rock climbing crete Greece
The restaurant we ate at in Therissos.

We have learned that the best way to order food at Greek restaurants is to just ask them to cook for your group. This time we ended up with pork chops, Greek salad, traditional greens, bread, and staka.

Staka is a traditional Greek dish (like a roux) made from goat’s milk. It’s common to serve cracked eggs and french fries in the staka, which makes it kinda like poutine. I highly recommend trying it!

Consider making Crete your next climbing destination!

If you are a beginner to climbing, there are several tour companies that offer guided trips. If you have your own gear, there are some excellent resources on the best climbing spots and how to get there. This book has the most up-to-date info on sport climbing in Greece, including a few places in Crete: Greece sport climbing: the best of 2017.

Or if you are just going on a sightseeing trip in Crete, consider adding on a day or two of rock climbing!

Canyoneering Trip in Crete, Greece

What is canyoneering?

It’s only one of the coolest adventures you can take!

Seriously, canyoneering (or canyoning) is defined as “travelling in canyons using a variety of techniques that may include other outdoor activities such as walking, scrambling, climbing, jumping, abseiling (rappelling), and swimming.” (from Wikipedia).

Essentially, it’s moving through a canyon, which is already usually an incredible experience, but with some added technical difficulty. When you reach a spot in the canyon that has a steep cliff, you just use ropes to rappel down to the bottom. Sometimes there are waterfalls involved, which make it even more awesome.

In this particular trip, there was no water flowing through the canyon, but it was still pretty awesome. We traveled down a short canyon that opens up to Seitan beach, on the Akrotiri peninsula in Crete.

First Step: Learning the Techniques

Since none of us had been canyoneering before, our guide, Tim, showed us the ropes before setting out (literally!). We had to practice hooking up to the rope and the proper technique for rappelling.

canyoneering Crete greece
Practicing in the parking lot.

After the intro session, we gathered up all our gear and set off in the van. We had canyoneering harnesses that have a butt protector, multiple ropes, dry bags, Figure 8 descenders, gloves, and plenty of carabiners.

Second Step: The Approach

We started at the top of the road that leads into Seitan Beach, but instead of driving down to the beach, we walked in the opposite direction. I believe this canyon is on private land, but Tim knows the owners and had their permission to use the route.

canyoneering Crete greece
This picturesque church is located at the top of the road leading down to Seitan Limania Beach.

We got to the beginning of the canyon and started by hiking down. It immediately became obvious that knowing the weather forecast is crucial to this sport: a flash flood would be extremely dangerous while trapped in this narrow space.

canyoneering Crete greece
Hiking down into the canyon with our dry bags.

Third Step: Practicing on the Short Drops

A few minutes later we reached our first drop-off. This particular route is excellent for beginners because there are a couple of short rappels to boost your confidence. At the end are two 30 meter (100 ft)  cliffs, which give you an adrenaline rush that will keep you coming back!

canyoneering Crete greece
One of the shorter rappels.

In canyoneering, it’s very important to always be clipped in to the anchor when you are close to the edge. Sometimes there are multiple anchors to allow you to traverse across particularly tricky sections. At these spots, you want to always keep at least one carabiner from your harness clipped in to the rope.

After a couple of drops, we could begin to see the beach from afar. While most of us had been to this beach before, we had no idea it was possible to rappel the canyon right next to it!

canyoneering Crete greece
You can see Seitan Limania beach way off in the distance!

Fourth Step: Stay Calm on the Big Drops!

It wasn’t long before we reached the first of the 30 meter cliffs. It’s a bit nerve wracking to realize that a strong hold of your brake hand is all that’s preventing you from plummeting down a huge cliff! But once you actually get clipped in and start rappelling, it’s a blast!

canyoneering Crete greece
Rappelling down a 30 meter drop!

It’s also a great team-building exercise. All of us are co-workers, and you have to be able to trust your climbing partners with holding the rope that prevents you from falling a hundred feet. I think we definitely felt more closely bonded after this trip!

At the bottom of the last drop, we had a herd of goats pass us by while we were waiting for everyone to get down. These goats are excellent climbers and are a classic sight in the mountains of Crete. The sound of their bells and their braying is unmistakable.

canyoneering Crete greece
A herd of goats that were rock climbing around us!

Fifth Step: Celebrate by Swimming at the Beach!

Okay, so this step isn’t really necessary for canyoneering, but it’s still fun! It was a short walk from the last rappel to the beach. It was early enough in the year that the beach was not crowded, although I think the few people there looked at us funny with all our gear. We all swam in the freezing cold water!

We had also brought some food to share as we relaxed at the beach. It was the perfect way to end an awesome trip. I wrote about Seitan Limania beach a bit in my previous post describing 10 amazing beaches in Crete. Just for the record, it is my favorite beach in Crete just because it’s so unique!

canyoneering Crete greece seitan limania beach
What we call Secret Beach!

Here’s another “secret” about this beach: there is a small church built into a cave that you can access from the road to the beach. We had to walk up the steep switchbacked road to get back to the van at the top. On the way, Tim showed us the path that led to the church and talked about some of the traditions surrounding the Greek Orthodox Church.

Now I really want to get into canyoneering in the future. In the US, it’s very popular in the slot canyons in the Southwest. Someday I’m going to take a trip there and do some rappelling down waterfalls!


Hiking Granite Mountain

I don’t know why, but I love doing hikes to a fire tower – maybe it’s just the novelty of seeing a man-made structure after walking through miles of wilderness. Granite Mountain Trail takes you up, up, and up to the top of a mountain with a lookout that was originally built in 1924.

This hike is 8.6 miles out and back, with 3800 ft of elevation gain. It’s relentlessly uphill, so be prepared for your legs to hurt!

Getting to the Trailhead

The trailhead for Granite Mountain is right off of I-90,  to the east of Seattle. When I moved to Washington, I quickly realized that many of the best hiking trails required driving long distances on windy gravel roads covered with potholes. So the ease of access is a huge plus to this trail.

I arrived at the trailhead at 8:30 AM and the parking lot was already full, with more cars parked along the road leading to the trail head. So if you’re wondering how early you need to get to a popular trail near Seattle on a beautiful summer day to beat the crowds, the answer is much earlier than 8:30 AM!

granite mountain hiking
Long line of cars parked outside the trailhead.

When I go hiking alone, I actually prefer to be on busy trails because if anything were to happen, there are plenty of people around to provide assistance! Plus it’s much more difficult to get lost.

The hike to Granite Mountain shares a trailhead with Pratt Lake trail, and you must have a Northwest Forest Pass to park there ($30 for a yearly pass).

Granite Mountain trail starts off suspiciously easy!

The first mile is a gradual climb and wanders though a beautiful forest, crossing a few streams. After 1.2 miles, the trail splits off with Pratt Lake to the left and Granite Mountain to the right.

granite mountain hiking

At this point, the trail begins steep switchbacks up the mountain. After about a mile you leave the shade of the forest and enter alpine meadows. The views are spectacular, but if it’s hot there’s no shelter from the sun.

If you look to the south, you can see Mt. Rainier peek out above the other mountains as you gain elevation. There are several other peaks that present themselves, providing 360 degree mountain views.

granite mountain hiking
You can see Mt. Rainier peeking out!

There are two ways to get to the summit.

Towards the top there is a small meadow, with two options for reaching the summit: the “boulder route” is to the left, and requires scrambling on boulders along the ridge, and the “summer route” to the right, which is slightly longer, but gently ascends through the meadow.

granite mountain hiking
You can go left and scramble over boulders along the ridge, or go right for a gentler approach on snow-covered fields.

The summer route is often covered with snow until late July, which can make the boulder route more attractive to some people. I did this hike on July 14, and there were still a few patches of snow. All the snow was on flat ground however, which made it easy to traverse.

I was a bit confused by the different options at first and ended up doing the boulder route up to the top and coming down on the summer route. The boulder route is definitely more scenic and provides ridiculously amazing views in either direction along the ridge. It does require some minor scrambling over rocks, and if you have a dog you will have to take the summer route.

granite mountain hiking
View of surrounding mountains from the top

Take a few minutes to enjoy the scenery at the summit!

The lookout tower is normally closed to the public, but provides a nice spot to rest and eat lunch. On a nice day in the summer, expect the summit to be quite crowded. Luckily, the abundance of boulders on the ridge provides ample spots to rest while enjoying the views.

Unfortunately, what goes up must come down, and descending a steep trail like this one can be difficult on the knees. I kept thinking I was almost to the end, but the trail just kept going!

It took me about 5 hours to do the entire hike, but that includes spending some time at the top to eat and take photos.

Overall, I highly recommend this trail to anyone who wants a great workout with a nice payoff at the end.

granite mountain hiking